Back in March I posted about a cute little Easter Garland I whipped up to add a touch of Spring to our mantle. In that post I discussed how I was struggling to make our house feel homey... Well, we have now lived in our cute little casa for nine, almost ten, months and unfortunately not a lot has changed.
So, in order to get our ducks in a row and get something (anything!) hung on the walls, Brandon and I made two large "To Do" lists... The first list was made up of things we needed to tackle that didn't require us to purchase anything and the second list was things we need to buy in order by priority.
As luck would have it, both lists were almost exactly the same length so in order to encourage ourselves to get things marked off BOTH lists we made a rule: In order to purchase something off list #2, you have to finish a task from list #1.
This girl happens to love four things - 1. God; 2. BK and the fam; 3. Lists; 4. Having a Plan. (Okay, confession: five things... I'd be lying if I didn't have chocolate in there somewhere) Ever since we got this all written down, I have been rollin'! So I thought I'd share our first official something on the wall!
I would like to preface these pictures by giving you a heads up on my decorating style... but I can't figure out how to explain it!! So here's the best I can do without over thinking - I love antiques. I like warm colors. I tend to pick things that bring the outdoors inside. Alright, good enough for now...
So, I knew in my living room I wanted to hang some plates because I LOOOOOVE me some dishes! I had also found these pictures of trees that were printed onto burlap canvas in an antique store (even though they aren't old) and I simply had to have them. But that was all I had and regardless of how I laid it out, it just didn't seem complete.
So I brainstormed, scoured Pinterest and then thought about the homes of people I know and love and tried to remember what they did to decorate. Well, I finally came to the somewhat random conclusion that I wanted to incorporate some old boat paddles. Don't ask me how or why or what brought this about, but I was on a mission to find some old paddles and they were going in our living room. Done.
Do you know how hard it is to buy old boat paddles? I do, virtually impossible. I searched antique stores, flea markets and estate sales - either boat paddles are a hot commodity and they got snatched before I got there or people just didn't have them. I'm leaning towards the latter.
So, I finally gave up on finding the perfect paddle and decided to create my own. I found two paddles at an antique store (again, not old... what's the deal with that?) and brought them home to begin the transformation!
This is what I started with...
The paddles were used, so they did have some wear and tear on the ends but overall they were in way too good of shape for what I had in mind. They were also a yellow wood and I wanted them to be dark...
The first thing I did was buy some sandpaper and sand my little heart out. I had to sand off the gloss sealant and the place where the big ol' sticker was. I sanded, and sanded, and sanded, and wished I had borrowed my dad's sanding machine because the sand paper was doing a number on my manicure.
And then I sanded some more. FINALLY, I got down to the good stuff.
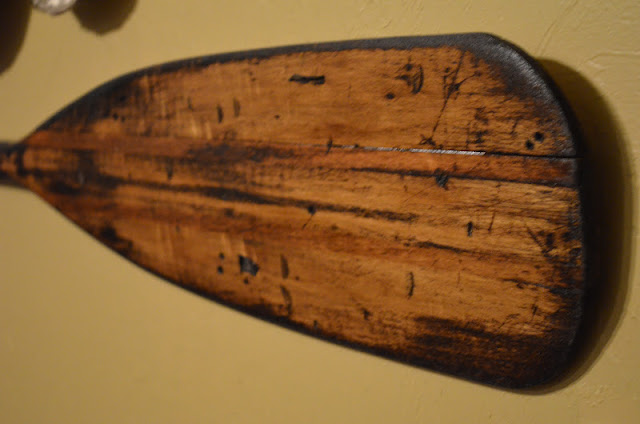
Next I had to rough them up a bit. Using a phillips screw driver, I made some holes of different sizes... not all the way through, just partially. I think they kind of ended up looking like a hole a worm would make, I liked it.
Then I got out the hammer (Yes, my hammer is leopard... Don't act like you aren't jealous.) and beat the snot out of that paddle! I just hammered away, leaving big ol' dents all over it. Then I flipped the hammer over to the nail remover end (I'm sure there is a technical term for this but I don't know it) and made big chunky scratches.
 |
| Paddles before/after being glazed... See how the glaze enhances the dents and dings! |
Finally I got out a sponge and started glazing! Because I wanted the paddles to be a dark shade, multiple glazing sessions were required and as I am not a single bit patient when I get a project underway, I never waited the recommended amount of time... Probably not a good idea, it ended up taking at least two extra coats and almost two days for the thing to stop feeling sticky! Oh well, lesson learned.
After letting them dry for a day or two, BK used his man skills to figure out how to hang those bad boys... I had to close my eyes because it required drilling screws into the paddles and I was just positive he would accidentally push them all the way through, but he didn't! He's a pretty good handy man, I think I'll keep him.
 |
| Probably should've straightened that middle guy before taking this picture... Pretend like he isn't crooked, okay? Thanks. |
Be Blessed!
Raegan


